-
Solar Post Cap Lights Outdoor, Fence Post Solar Lights Metal 2 Pack for 3.5×3.5/4×4/5×5/6×6 Wooden Posts
Product Name: Solar Post Lights
Model number: YC-PL004
Power source: Solar Powered
Solar Panel: Monocrystalline Silicon
Battery: 1.2v 1200mAh Ni-MH AA battery
LED : 1 LED warm white led
Charging time: 4-6 hours
Working time: 6-10 hours
Material: metal
Size: 16*16*8 cm
OEM: Yes
Packaging: Color Box
-
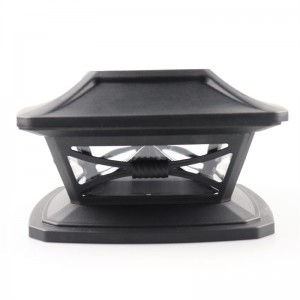
Solar Outdoor Post Cap Lights Includes Bases for 4×4 5×5 6×6 Wooden Posts
Product Name: Solar Post Lights
Model number: YC-PL005
Power source: Solar Powered
Solar Panel: Monocrystalline Silicon
Battery: 1.2v 600mAh Ni-MH battery
LED : 1 LED
Charging time: 6 hours
Working time: 6-8 hours
Material: ABS
Size: 16*16*10 cm
OEM: Yes
-
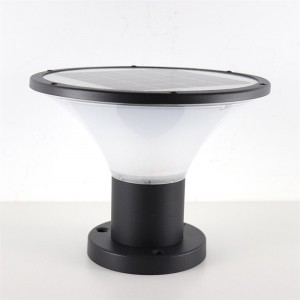
Solar Pillar Lights Outdoor, Waterproof Column Lights Aluminum Exterior Gate Solar Pillar Lamp
Product Name: Solar Pillar Lights
Model number: YC-PL006
Power source: Solar Powered
Solar Panel: Polycrystalline silicon 6V/2W
Battery: 3.7V 1200mAh Ni-MH 18650 battery
LED : 26PCS 2W SMD2835 LED
Charging time: 6-8 hours
Working time: 10-12 hours
Material: Aluminum + PC
Size: 15*15*19cm
OEM: Yes
-
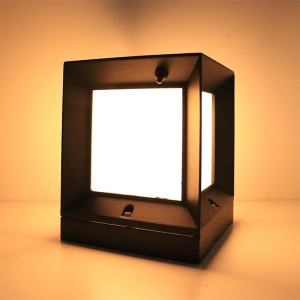
High Lumen Sensor Led Solar Powered Bollard Lights For Outdoor Garden
Monocrystalline photovoltaic panel: 5V/8W
Lithium battery:3.7V/4.4AH
LED:SMD3535,150lm/W
Lamp body size:Φ205*160mm
Intelligent controller, three kinds of color temperature, free to switch
-
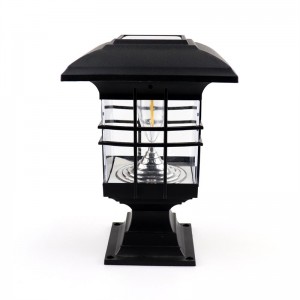
Solar Post Lights Outdoor, Waterproof LED Tungsten Filament Bulb Deck Fence Cap Light for Garden Decoration
Product Name: Solar Post Lights
Model number: YC-PL001
Power source: Solar Powered
Solar Panel: Polycrystalline Silicon 2.5V/100mA
Battery: 1.2V 600mAh AA Ni-CB Battery
LED : LED Tungsten Filament Bulb
Charging time: 6-8 hours
Working time: 8-10 hours
Material: ABS + PC
Size: 21*14*14 cm
-
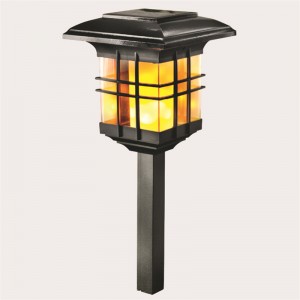
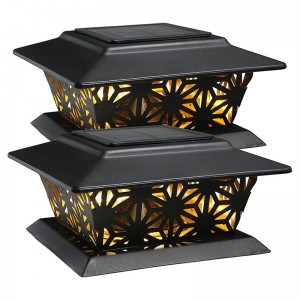
Solar Flame Post Lights, Outdoor Brightness 51 LEDs Flickering Flame Solar Powered Cap Light for Yard Fence Deck
Product Name: Solar Post Lights
Model number: YC-PL003
Power source: Solar Powered
Solar Panel: 1.2V/100mA
Battery: 1.2V 600mAh AA Ni-CB Battery
LED : 51pcs yellow LED
Charging time: 6-8 hours
Working time: 8-10 hours
Material: PS + PP


